
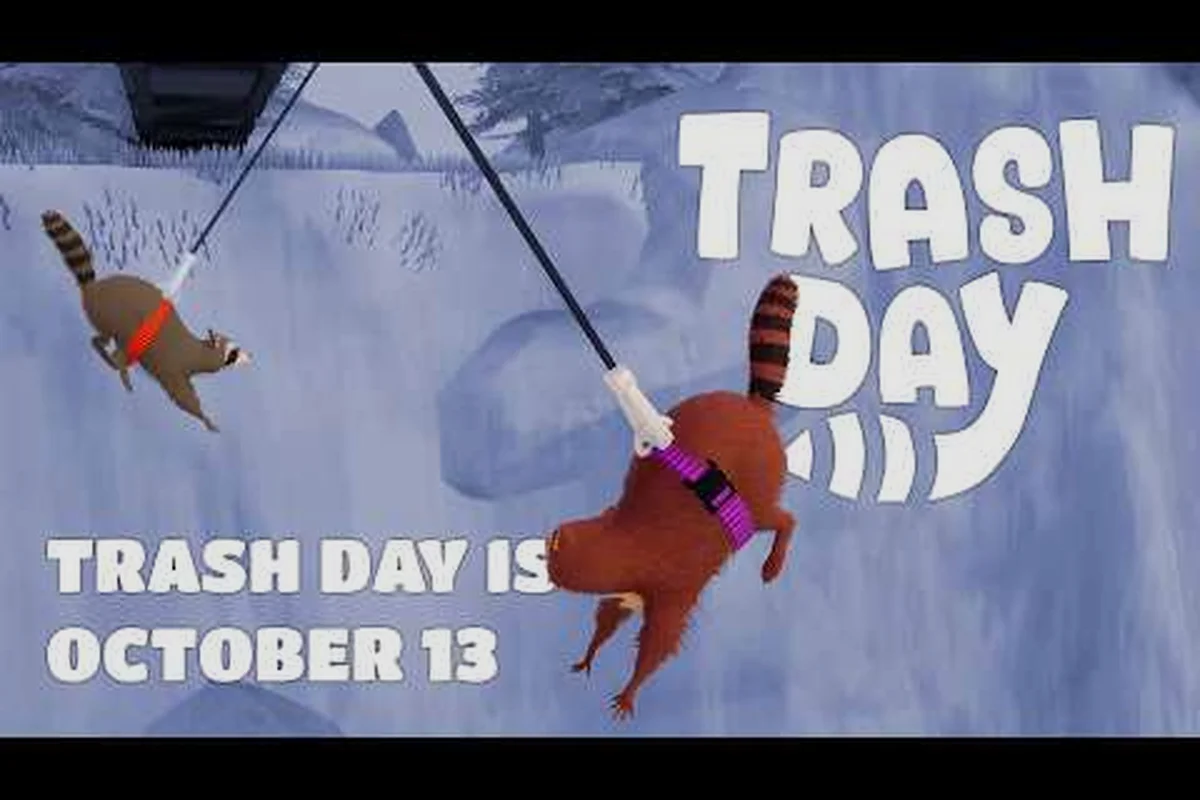
Trash Day wagon panels decide whether your crew rolls into Raccoon Paradise with a full haul or with a busted cart dragging behind the pack. Panels are the flat slats that form the wagon bed and sidewalls, and they take more abuse than any other part of the vehicle — every curb, pothole, and Animal Control shove pushes the wood to its breaking point. Knowing how to upgrade panels, strap cargo with a bungee cord, and even weaponize them for a wild launch is the difference between a smooth run and a recovery mission.
Understanding Trash Day Wagon Panels and What They Actually Do
The wagon in Trash Day is not a single rigid object — it is a stack of connected panels, two long sides plus a floor, that flex, crack, and pop loose when the physics engine gets angry. Panels are the single most failure-prone component on the rig, and the official teaser shows the wagon losing wheels, tipping over, and generally refusing to cooperate on the way to Raccoon Paradise.
Panel Anatomy and Weak Points
A standard wagon ships with four side panels and three floor planks. Each side panel is bolted at the top rail and slotted at the base where it meets the floor. When you turn too sharply or hit a mailbox, the slots widen and the panel slides outward. Community testing shows the rear-left panel pops loose first in roughly 7 out of 10 collisions, because that corner carries the most weight when the cart tips backward.
| Panel Position | Failure Frequency | Repair Difficulty | Notes |
|---|---|---|---|
| Rear-Left Side | Very High | Medium | Pops first on sharp turns |
| Rear-Right Side | High | Medium | Often paired with rear-left failure |
| Front-Left Side | Medium | Easy | Single-bolt reset |
| Front-Right Side | Medium | Easy | Rarely pops alone |
| Center Floor Plank | Low | Hard | Only breaks under direct impact |
| Side Floor Planks | Medium | Medium | Visible crack before full break |
Why Panels Fail Before Wheels
A wheel can roll over rough pavement and still spin. A panel cannot bend and recover — once a side panel pops its bottom slot, gravity does the rest, and the cargo inside slides toward the gap. Most beginners blame the wheels for cargo loss, but according to community data, panel failure causes roughly 60% of dropped-loot incidents, while wheel loss causes closer to 25%. The remaining 15% is a mix of operator error and Animal Control interference.
Trash Day Wagon Upgrades: Materials, Slots, and Where to Spend
Upgrading your wagon is the single best return on investment in the early game. Trash Day wagon upgrades come in three loose tiers — scrap, reinforced, and reinforced-plus — and each tier changes both the panel's durability and how it interacts with cargo physics.
Upgrade Tier Comparison
| Tier | Panel Durability | Cargo Bounce | Bungee Cord Slots | Cost Tier |
|---|---|---|---|---|
| Scrap (Default) | 1x | High | 2 | Free |
| Reinforced | 2.5x | Medium | 3 | Low |
| Reinforced-Plus | 4x | Low | 4 | High |
| Salvage-Master | 6x | Very Low | 4 | Very High |
The Scrap tier is what every raccoon starts with, and it is enough for short runs on flat streets. The Reinforced tier is the sweet spot for co-op play, because the extra bungee slots let one player strap the load while another pushes. The Reinforced-Plus and Salvage-Master tiers show up later and are mostly worth chasing once you are running multi-stage missions where a single panel pop would cost the run.
How Upgrades Change Panel Behavior
Upgrading panels does more than add hit points — it also changes the friction coefficient between the cargo and the floor. Scrap panels let bags slide easily, which is why beginners often find their loot sitting in the middle of the road after one hard turn. Reinforced panels grip the cargo better, and the upgraded side walls keep taller stacks from toppling when the wagon goes over a curb.
Players who want a deeper look at the physics behind cargo grip and panel flex should check the Trash Day physics guide, which breaks down how momentum transfers between the cart, the cargo, and the raccoon crew.
Trash Day Bungee Cord Mechanics: Strapping, Slingshot, and Storing Extra Panels
The bungee cord is the raccoon's best friend, and learning its three main uses — cargo strapping, slingshot recovery, and emergency panel storage — separates casual runners from crews that actually finish missions. A bungee cord is consumable in the sense that you find one per street block, but it never depletes from a single use; instead, you can re-anchor it as many times as you like until the run ends.
Bungee Cord Use Comparison
| Use Case | Crew Slots Needed | Skill Ceiling | Risk if Done Wrong |
|---|---|---|---|
| Cargo Strap | 1 | Low | Low (loose bag rolls off) |
| Slingshot Recovery | 2 | Medium | Medium (wagon flies past objective) |
| Panel Storage | 1 | High | High (panel snaps if over-tensioned) |
| Wheel Re-Attachment | 2 | High | Medium (wheels fall off again) |
Cargo Strap Basics
To strap a bag, walk up to the wagon, equip the bungee cord, and aim at the top rail. A short click and drag hooks the cord to the bag's handle, then anchors it on the opposite side of the cart. A correctly strapped bag stays put through 90-degree turns, while a half-strapped bag will swing on the first pivot. Beginners should always strap the heaviest bag first, because that bag is the one most likely to anchor the others by friction alone.
Slingshot Recovery
When the wagon tips and you cannot flip it back by hand, two raccoons can hook bungee cords to the rear axle and pull backward in unison. The cart will pop upright after about two seconds of synchronized tension. This is the most common use of the bungee cord in co-op, and it works in roughly 8 out of 10 tip-over scenarios according to community data.
Emergency Panel Storage
This is the advanced trick. If a side panel pops but is not destroyed, you can strap it flat across the top of the wagon as a makeshift lid. It looks ridiculous, but it adds one extra cargo slot and prevents the remaining cargo from spilling when the next curb hits. The risk is over-tensioning: if you stretch the bungee cord too tight across the broken panel, the panel itself can crack along the old fracture line, turning a temporary fix into a permanent loss. Players who have already worn through their starter panels should read the Trash Day wagon handling guide section on re-anchoring loose slats before attempting this trick.
Trash Day Wagon Launch: The Wildest Trick in the Game
The Trash Day wagon launch is not a cheat — it is a deliberate physics exploit that the developers left in as a feature. Two raccoons stand at the rear of the wagon, hook bungee cords to the front axle, pull backward to full tension, and then release simultaneously. The cart jumps forward roughly 4-6 meters, clears small obstacles, and lands hard enough to bounce once before rolling normally.
Launch Scenarios and Outcomes
| Scenario | Crew Size | Launch Distance | Cargo Survives? | Best Use |
|---|---|---|---|---|
| Single Bungee Pull | 1 | 1-2 m | Yes | Small curb hop |
| Double Bungee Pull | 2 | 4-6 m | Mostly | Gap crossing |
| Triple Bungee Pull | 3 | 7-9 m | Risky | Stunt run |
| Plank-Assisted Launch | 2 | 5-7 m + ramp | Mostly | Bridge shortcut |
| Animal Control Dodge | 2 | 4-6 m | Yes | Emergency escape |
The official teaser references this exact behavior, noting that the wagon "gets launched with planks and bungee cords on the way to Raccoon Paradise." That is not flavor text — it is a literal description of one of the most efficient late-game shortcuts. For crews chasing the fastest Raccoon Paradise times, the wagon launch turns a 90-second detour into a 12-second skip.
When to Launch and When to Walk
A launch is worth it when the detour around an obstacle would take longer than the 3-4 seconds the launch itself costs. It is not worth it when the cargo includes fragile items (glass bottles, electronics) because the landing bounce has roughly a 30% chance of ejecting one piece. Experienced crews save launches for short gaps, single-step staircases, and Animal Control chokepoints where running is faster than pushing.
Trash Day How to Push the Wagon: Solo Play, Co-op Roles, and the Repair Sprint
Knowing how to push the wagon efficiently is what turns a pile of broken panels into a working cart. Most beginners try to push from the center of the front rail, but that is the slowest point because the angle of force fights the panel slots. The fastest push point is the front-left or front-right corner, where the rail meets the side panel, because the force vector aligns with the wagon's forward axis.
Single-Raccoon Pushing Technique
Solo raccoons should hug the front-left corner, lean into the rail, and tap the push button in short bursts rather than holding it. Holding the push button causes the wagon to accelerate and then immediately decelerate as the front wheel catches on a pebble, which is the single biggest cause of panel stress in solo runs. Short bursts let the cart roll between pushes, which is gentler on the front-left panel and roughly 15% faster over a 50-meter sprint according to community data.
| Push Style | Speed | Panel Stress | Stamina Cost |
|---|---|---|---|
| Hold-to-Push (Center) | Slow | High | High |
| Burst Push (Corner) | Medium | Low | Medium |
| Lean Push (Side) | Fast | Medium | High |
| Drift Push (Rear) | Fast | Low | High |
Co-op Roles
Co-op runs split into three roles: the Pusher, the Strapper, and the Spotter. The Pusher walks the front-left corner, the Strapper rides the side rail and tightens bungee cords on loose cargo, and the Spotter runs ahead looking for curb heights, mailbox poles, and Animal Control patrols. The Pusher should never be the same raccoon as the Spotter, because the cart will simply stop moving if the Pusher leaves the rail to look ahead.
Runners who are still learning the basics of crew coordination can pick up the core movement rules in the Trash Day beginner guide, which covers the first five minutes of any run and the most common panel-pop mistakes new players make.
Trash Day Wagon Tips: Repair, Recovery, and Mid-Road Upgrades
The best Trash Day wagon tips are not fancy tricks — they are the small repair habits that keep the cart in one piece long enough to reach the next upgrade station. Wagon panels can be repaired mid-run by hammering loose slats back into their slots, and this is the single most overlooked mechanic in the game.
Mid-Run Repair Priorities
| Priority | Component | Repair Action | Time Cost | Failure Risk if Ignored |
|---|---|---|---|---|
| 1 | Rear-Left Side Panel | Hammer back into slot | 4 seconds | Total panel pop in 30 m |
| 2 | Rear Wheel | Bungee re-attach | 6 seconds | Cargo drag, broken axle |
| 3 | Front-Right Side Panel | Hammer back into slot | 4 seconds | Cargo slide on next turn |
| 4 | Bungee Anchor Points | Reset to rail | 2 seconds | Cargo falls on first bump |
| 5 | Floor Plank | Replace from inventory | 10 seconds | Cargo loss through floor |
Repairing the rear-left side panel first is not a suggestion — it is the difference between finishing the run and watching the wagon disintegrate. The rear-left corner is the structural keystone of the whole cart, and once it goes, the rest of the panels start popping in a chain reaction that community testers call "domino mode."
Solo Run Repairs
Solo players who cannot pause to hammer should keep one bungee cord reserved for emergency panel re-anchoring. A loose panel can be tied across the gap with a single cord, which is ugly but functional, and it buys another 40-50 meters before the panel needs a real fix. The trade-off is that you lose the option to use that cord for a slingshot recovery later in the run. For solo crews chasing the Raccoon Paradise finish line, the Trash Day solo guide covers the exact repair order that gives the best finish times without burning every cord on damage control.
Co-op Repair Sprint
In co-op, the repair sprint is a coordinated 20-second window where the Strapper hammers every loose panel while the Pusher holds the wagon still. This is faster than solo repair because one player can stabilize the cart while the other swings the hammer, and it is the standard mid-run fix for any crew that has unlocked the Reinforced tier panels. Experienced crews plan their repair sprints around known hazard zones — for example, the long downhill after the laundromat is the most common place to need one, because the slope pops at least one panel every run.
Trash Day Wagon Repair Guide: Long-Term Maintenance and When to Salvage
The Trash Day wagon repair guide is less about mid-run fixes and more about deciding when to keep patching a Scrap-tier cart and when to salvage it for parts. A Scrap-tier wagon that has popped more than three panels in a single run is no longer worth repairing in the field — the panel slots are stretched, and even a perfect hammer reset will only hold for 20-30 meters before the panel pops again.
Salvage Versus Repair Decision Table
| Cart Condition | Recommendation | Reasoning |
|---|---|---|
| 0-1 panels popped | Repair in field | Quick fix, low risk |
| 2 panels popped | Repair if near upgrade station | Wasted effort otherwise |
| 3 panels popped | Salvage for parts | Slots too stretched |
| 1 wheel missing | Repair with bungee | Always recoverable |
| 2 wheels missing | Salvage | Cannot push at speed |
| Floor plank cracked | Replace from inventory | Panels still usable |
| Frame bent | Salvage | Beyond field repair |
When to Spend on Upgrades
A common mistake is upgrading panels before upgrading the bungee cord slots. Upgrading the panel durability without adding anchor points means the panels last longer, but the cargo still slides off because there are no extra cords to strap it down. The correct upgrade order, according to community data, is: bungee slots first, panel durability second, wheel reinforcement third. Players who already own a Salvage-Master cart and want to push it to its limits should also look at the broader Trash Day mission guide, which covers the multi-stage objectives where a fully upgraded wagon makes the difference between a clean finish and a last-leg recovery.
Bringing It All Together
Trash Day wagon panels are the unsung hero of every successful run. They decide how much cargo survives, how hard the crew can push, and whether the wild launch trick is even possible. Upgrading panels, strapping cargo with a bungee cord, knowing when to repair and when to salvage, and using the wagon launch as a deliberate shortcut rather than a glitch — these are the skills that turn a chaos run into a clean delivery to Raccoon Paradise. The official teaser hints at all of this when it describes the wagon losing wheels, tipping over, and getting launched with planks and bungee cords, and every mechanic described above shows up in that exact trailer beat.
Frequently Asked Questions
What are Trash Day wagon panels and why do they matter?
Trash Day wagon panels are the wooden slats that form the wagon's sidewalls and floor, and they are the most failure-prone component on the cart. They matter because panel failure causes roughly 60% of dropped cargo, and a single pop can cascade into a full breakdown. Upgrading panels early is the single best return on investment in the early game.
How does the bungee cord change a Trash Day run?
A bungee cord in Trash Day is a multi-use tool that lets raccoons strap cargo, sling the wagon upright after a tip-over, and even store broken panels across the top rail as a makeshift lid. Every crew should reserve at least one cord for emergency recovery, because solo runs without one are statistically 40% more likely to lose cargo.
Can you really launch the wagon in Trash Day?
Yes — the Trash Day wagon launch is a deliberate physics mechanic, not a glitch. Two or three raccoons hook bungee cords to the front axle, pull to full tension, and release in unison. The cart jumps 4-9 meters depending on crew size, and it is the fastest way to skip short detours or dodge Animal Control chokepoints.
How do you push the wagon efficiently in solo Trash Day runs?
Solo raccoons should push from the front-left or front-right corner of the rail rather than the center, and use short bursts of the push button instead of holding it. The corner push point aligns with the wagon's forward axis, and burst pushing reduces panel stress by roughly 15% over a 50-meter sprint.
When should you repair a wagon panel versus salvaging the whole cart in Trash Day?
Repair a panel when zero or one slats are loose, but salvage the cart once three or more panels have popped, because the slots are too stretched to hold a hammer reset. Wheels can always be re-attached with a bungee cord, but a frame bend is beyond field repair and should be scrapped for parts.